This guide will review how to use the Shuffle Studio Uploader. The Uploader is used to upload your own custom Object or Prize models into Shuffle Studio. Note that the uploads must be one of the following file types:
- .FBX
- .GLTF
- .GLB
Click here to open this page in a new browser tab.
Topics Covered:
- Accessing the Uploader
- Using the Uploader
i. Accessing the Uploader
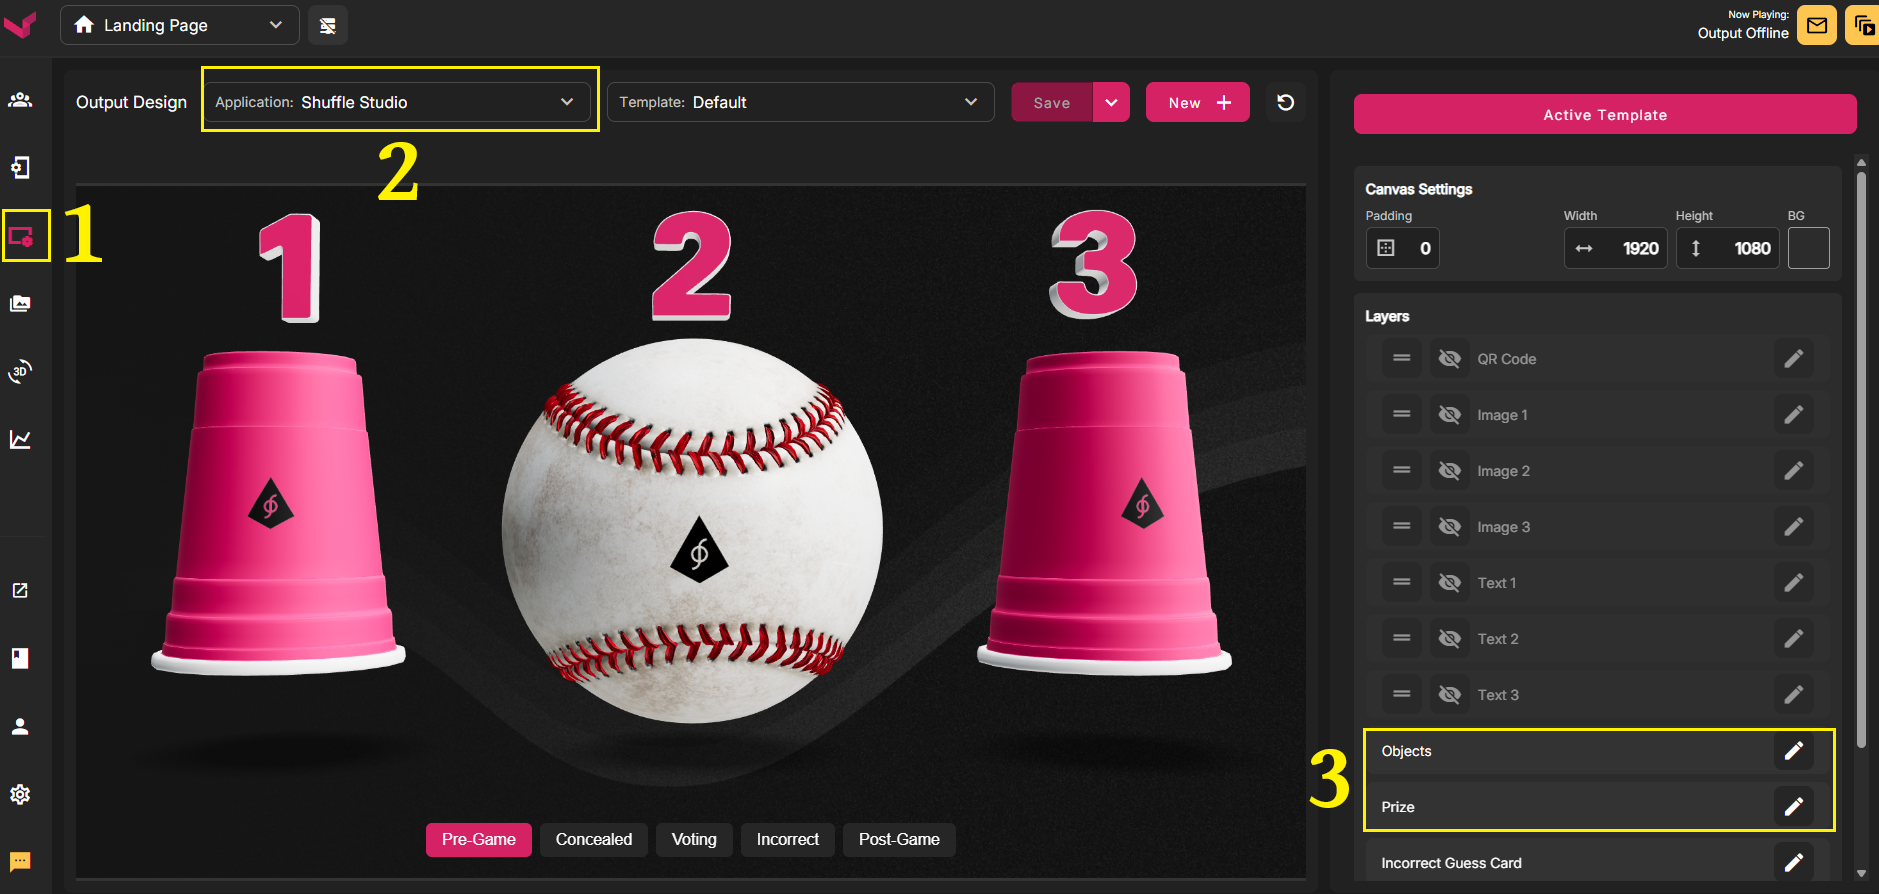
To access the Shuffle Studio Uploader, follow these quick steps:
- In the Left Nav, select Output Design
- In the Application Dropdown, select Shuffle Studio
- In the right column, click the Pencil/Edit button for either Object or Prize
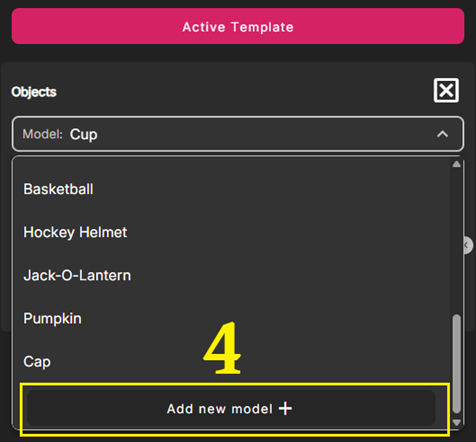
- In the dropdown menu for Object or Prize, select Add New Model
ii. Using the Uploader
To use the Uploader, you'll need to create your custom model outside suite. The model must be one of the following file types:
- .FBX
- .GLTF
- .GLB
Also note that custom models but be created in the desired color, with the desired logo included in the model. The Primary Color, Secondary Color, and Logo options are only available fot he to the standard, default models.
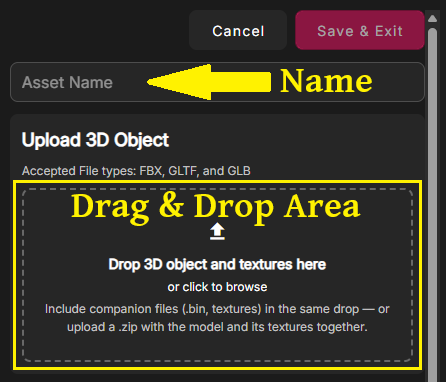
On the Uploader page, there's a field to name your Object (or Prize) and another area where you can drag and drop the file. Instead of dragging and dropping, you can also click that same area and use the PC's file explorer to select it.
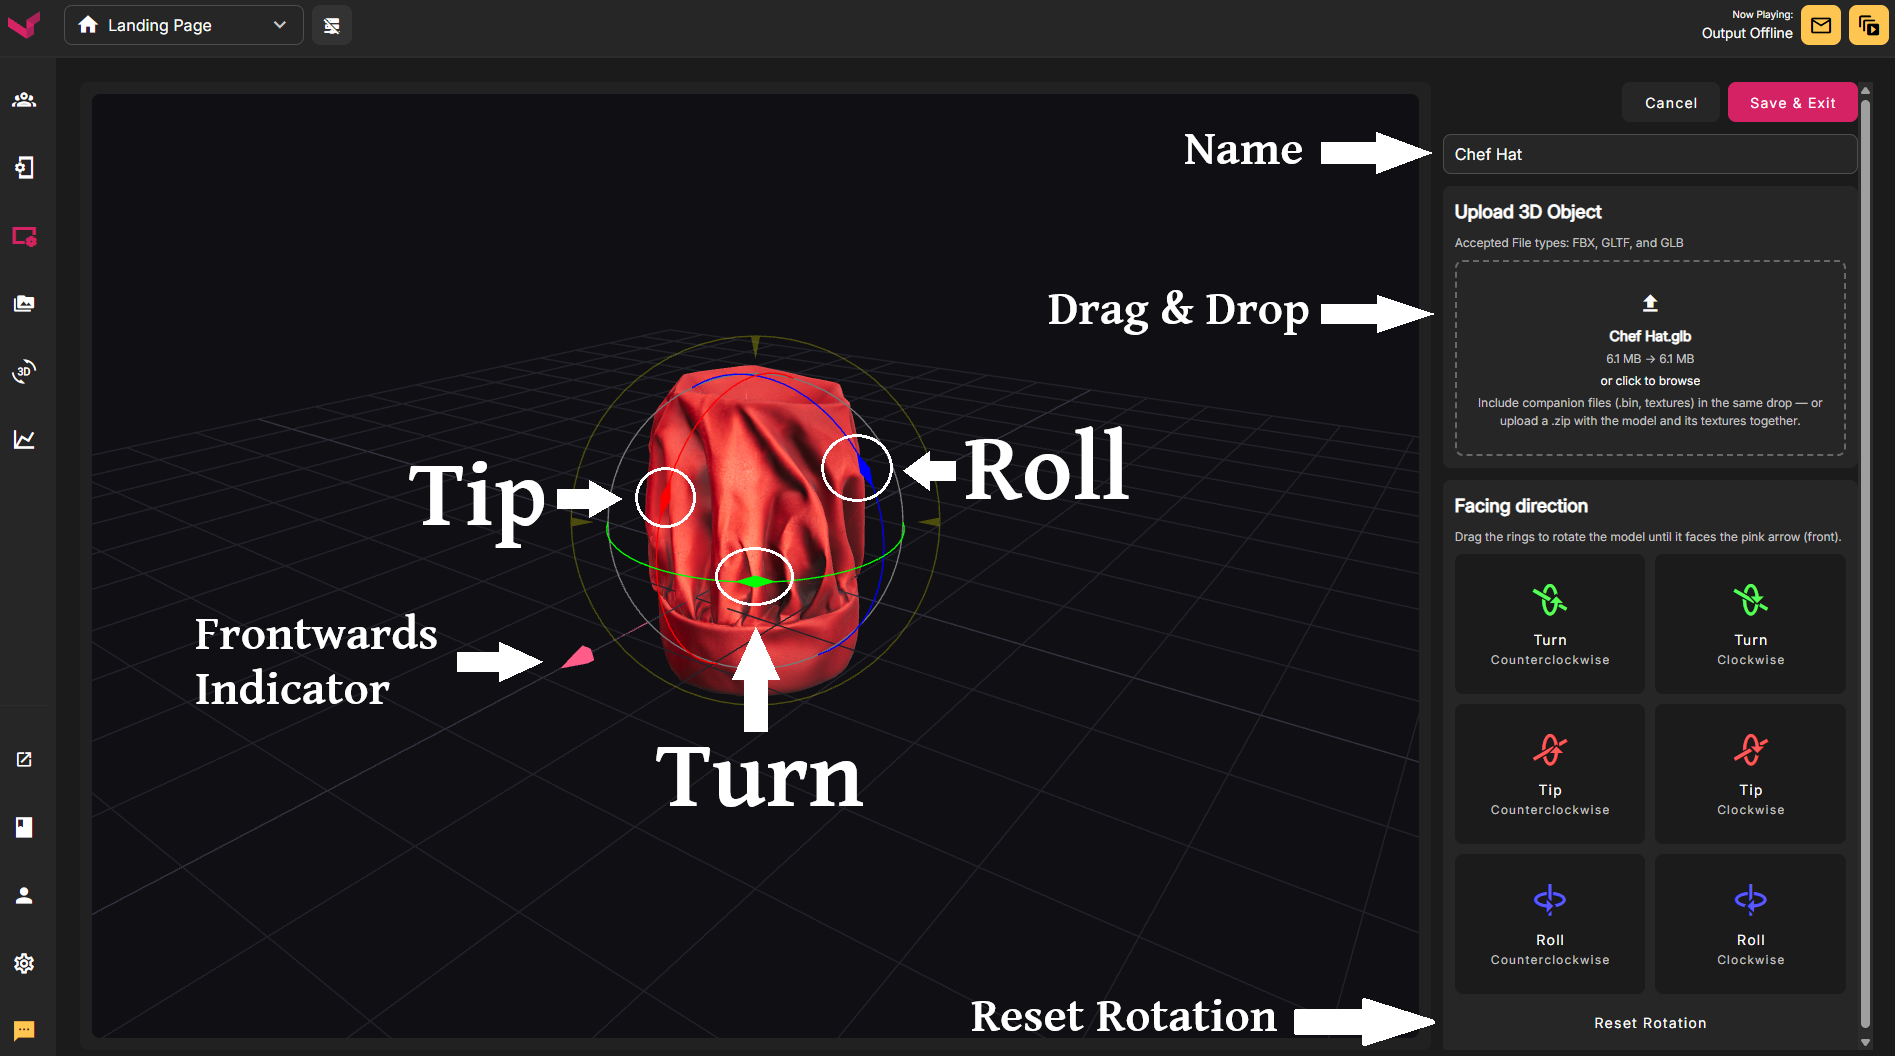
Once you've uploaded the custom model, the only thing left is to adjust it's default orientation. Your model may have been created facing towards the user, in which case you wouldn't need to make any adjustments.
If it's facing to the side, or if you want to change it's orientation for styling, you can rotate it on any access you want. The pink arrow notes which direction is the front. Use that as a reference when setting your orientation.
Changing the Orientation on the Grid:
Turn Counterclockwise / Clockwise: You can click directly on these buttons in the right column next to the grid. Clicking either button will rotate the object 90 degrees left/right. You can also click and hold the yellow arrow directly on the model, and then drag in in either direction.
Tip Counterclockwise / Clockwise: You can click directly on these buttons in the right column to tip the object 90 degrees forwards/backwards. You can also click, hold, and drag the blue arrow to manually tip.
Roll Counterclockwise / Clockwise: You can click these buttons to roll the object 90 degrees to the left/right. You can click, hold, and drag the outer arrow to manually roll.
Reset Rotation: Click this button to reset the Rotation back to default, as it was when you uploaded it.
Selecting the Custom Model for use in the Shuffle Studio App:
After choosing your orientation, click Save & Exit at the top of the right column on the page with the Grid. Once you've returned to the Shuffle Output Designer, ensure that your new model is selected in the dropdown and then Save your template. If your Shuffle Studio Output was already open, you'll need to refresh it to see the new model.
Was this article helpful?
That’s Great!
Thank you for your feedback
Sorry! We couldn't be helpful
Thank you for your feedback
Feedback sent
We appreciate your effort and will try to fix the article