This guide covers how to set up and run Photo Morph. Click here to open this page in a new browser tab.
Topics Covered
- Overview and General Flow
- Creating Prompts
- Preparing for an Activation
- Workflow on an Event Day
i. Overview and General Flow
Photo Morph is one of the Capture Apps, similar to Photo Magic and Animate. You start with a still image and use a prompt to change specific aspects of the image. The difference here is that Photo Morph creates a video, and the viewers see the photo transformation live.
Typical uses would be:
- Change the person's outfit to be wearing the home team's jersey
- Change the background of the photo to a specific recognizable background
- Replace the fan in the photo with another specific person (such as a player, or a celebrity)
The general flow of Photo Morph is the same as the other Capture Apps:
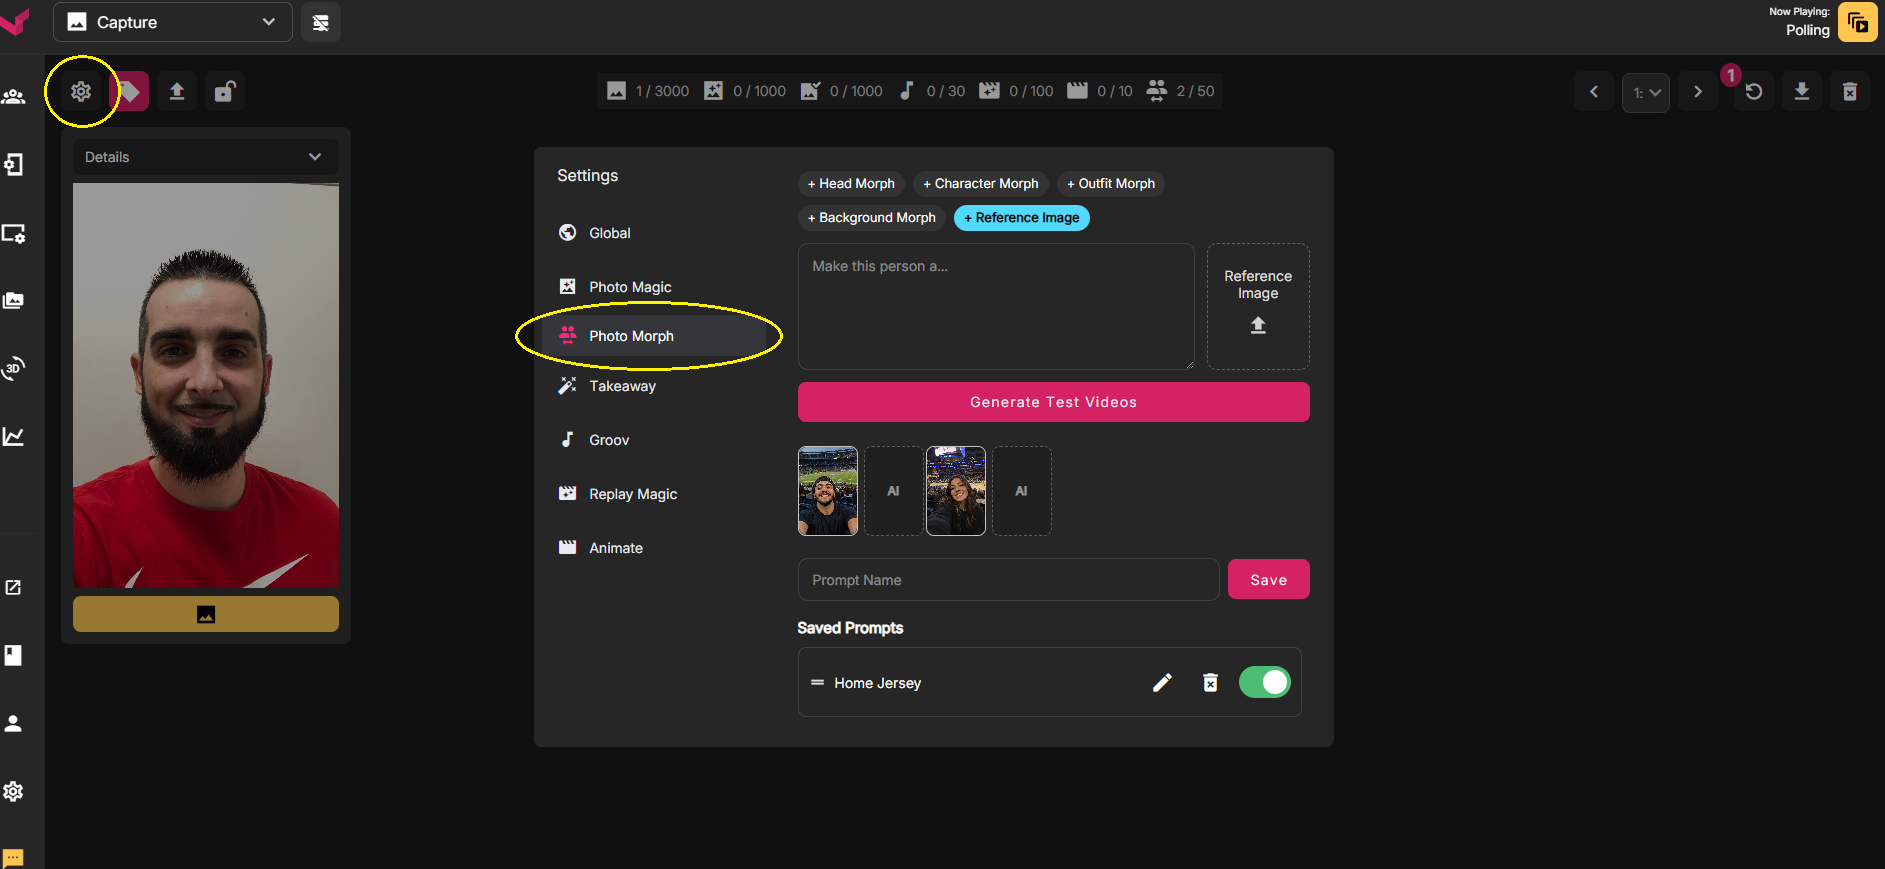
1. Create your prompt ahead of time (before event day, if possible). Click the gear in the upper left corner of the capture page to open the Prompt Builder. We will cover this in detail in the "Creating Prompts" section of this guide.
2. On Event Day, display your Capture QR Code on the video board (found in Left Nav, under Input/Output Links). You'd typically add it to a custom Call-to-Action graphic
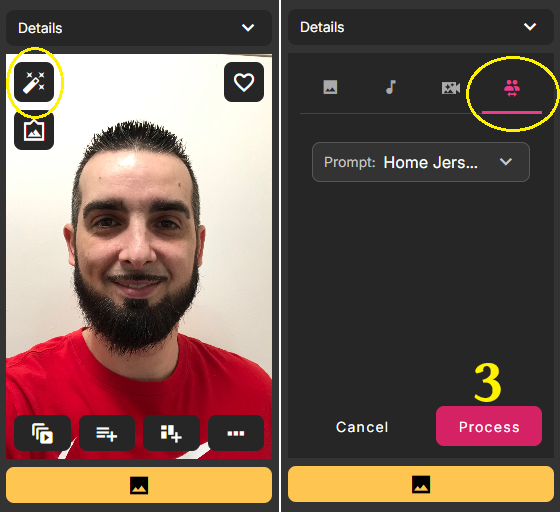
3. Once fan submissions begin to come in, use your Photo Morph prompt on multiple fan photos. Mouse hover any submission and click the magic wand in the upper left corner. Select Photo Morph, select the prompt, and click Process (as seen below)
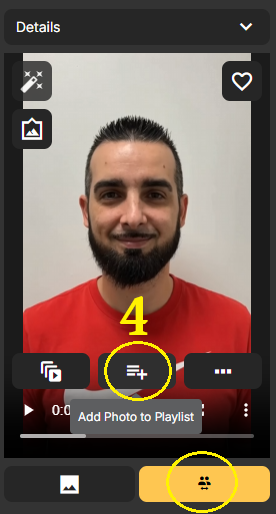
4. View the rendered results of various fan photos and find the ones you like most. With the Photo Morph render selected, click "Add to Playlist" to add that Photo Morph item to the Capture Playlist (screenshots below)
(Note that you can also download the Photo Morph video and composite them together outside of the suite. To download, first select the render using the buttons below the image. Then click the 3 horizontal dots and then click the Down Arrow to download that video.)
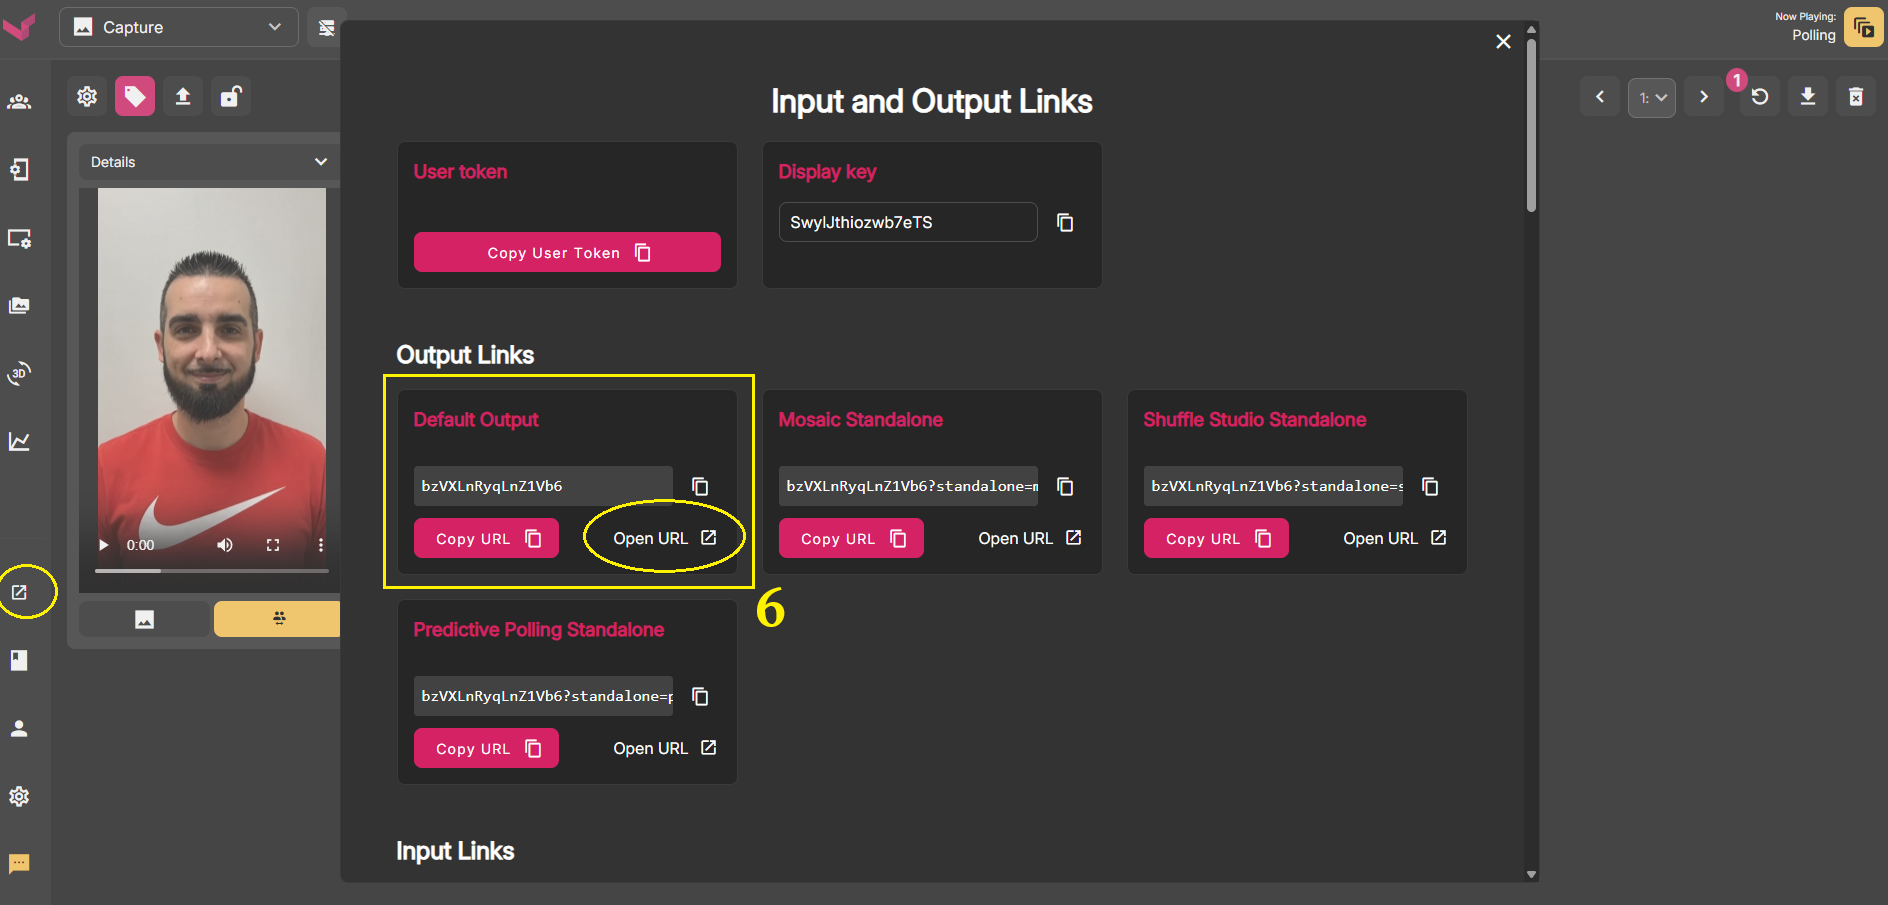
5. Mouse Hover the left nav and select Input/Output Apps
6. On this menu, find Default Output. Click OPEN URL, and move that Output tab to another monitor
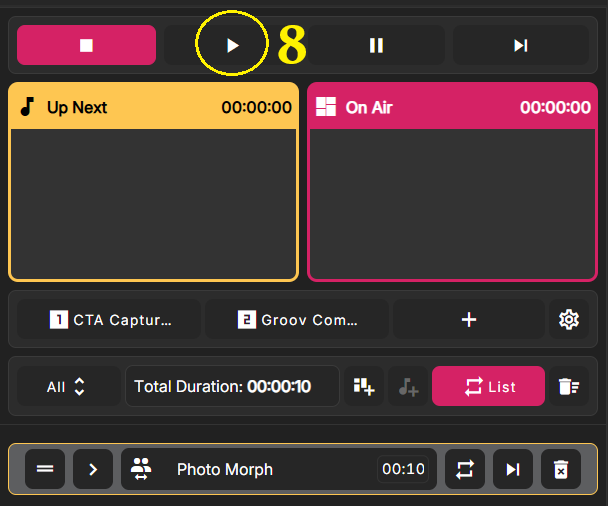
7. Press PLAY at the top of the Capture playlist, and your Photo Morph items will begin playback on the output
ii. Creating Prompts
To create a Photo Morph prompt, start on the Capture page and click the gear icon in the upper left corner. This opens the Prompt Builder menu. On this menu, select Photo Morph.
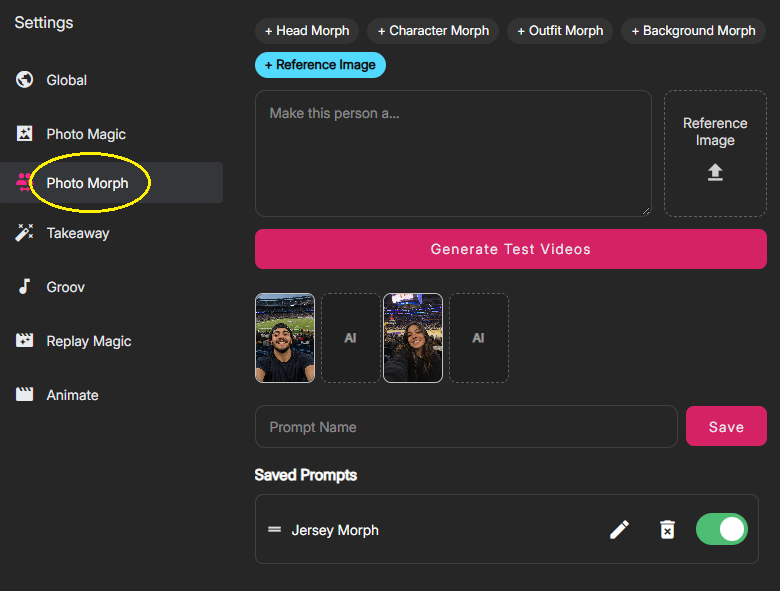
You can manually enter your own prompt, or you can use the prompt builder to create one.
To manually enter a prompt, simply type your prompt into the large text field. Then add a Name for the prompt in the Prompt Name field, and click Save. Any prompts you've created will appear in the list near the bottom.
To use the Prompt Builder, use the Quick Buttons at the top the Prompt Builder Menu. Each of the Quick Buttons generates a prompt that you can test, edit, and save.
No matter which Quick Button you use, they will all use the Reference Image in a different way. The reference image is an image you upload so that you can apply an aspect of that Reference Image to each fan photo that you render.
Head Morph:
The fan's head morphs into the exact head in the Reference Image.
Character Morph:
The entire fan morphs into the exact person in the Reference image.
Outfit Morph:
The fan's clothing morphs, and copies the clothing in the Reference Image. This is great for adding your home team's jersey to fan submission.
Background Morph:
The person remains the same but the background morphs into the same background as the reference image.
1. Use the Header dropdown to select Capture
2. On the Capture page, click the Gear icon in the upper left to open the Settings menu
3. On the Settings menu, click Photo Morph
4. Click one of the 4 default Quick Buttons: Head Morph, Character Morph, Outfit Morph, Background Morph
5. Upload an image into the Reference Image slot
6. Optional: Click "Generate Test Videos" to see examples of your prompt in action
7. Enter a Prompt Name in the field below and click save
iii. Preparing for an Activation
Steps to prepare for a Photo Morph Activation:
1. Decide the Morph Concept. A great starting idea is the home jersey, or even a background that's fun
2. Go to the Prompt Builder and select Photo Morph
3. Upload a Reference Image of a person wearing your home jersey. Since this image will be the basis for duplicating the jersey, you would want the picture to be clear and unobstructed
4. Click the Outfit Morph button. You'll see a sample prompt appear
5. Click "Generate Test Videos" to use your prompt on the test photos
6. If you like the Prompt, name it in the Prompt Name box, and then Save
7. If you don't like the results, pivot to a different Reference Image or a different Morph
iv. Workflow on an Event Day
Steps to Use Photo Morph on an Event Day:
1. As early as possible, display your Capture CTA to allow fans to send submissions. The moderator does not need to do anything while the CTA is displayed. You are merely collecting submissions
2. When enough submissions have come in and the moderator has time, use the header dropdown to select Capture
3. Hover over any submission and click the Magic Wand in the upper left corner
4. When the menu appears, click the tab on the far right: Photo Morph
5. Select your prompt in the dropdown and click Process
6. Repeat steps 3-5 with multiple fans so you can see multiple results of different people
7. View the results and find your favorites. Either (A) download them to composite into a video outside the suite, or (B) click the "Add to Playlist" button to add them to the Capture Playlist
8. Open the Output. In the Left Nav, choose Input/Output Apps and select OPEN URL for the Default Output
9. Press PLAY at the top of the playlist to begin playback on the Output
Was this article helpful?
That’s Great!
Thank you for your feedback
Sorry! We couldn't be helpful
Thank you for your feedback
Feedback sent
We appreciate your effort and will try to fix the article