Click here to open this guide in a new browser tab. You can also view the video guide for Live, or for Stream.
This guide will show you how to set up and use all 3 Streaming apps (Live, Home, and Stream).
Topics Covered:
- Accessing Input and Output
- Setting Up Phone Design and Output Design
- Moderation on Event Day - Live
- Moderation on Event Day - Home
- Moderation on Event Day - Stream
i. Accessing Input and Output
At any time, you can view the Video Board Output by opening the Left Nav and clicking Input/Output Links. Then, click "Open URL" in the lower right corner of the Output App as seen in the image below.

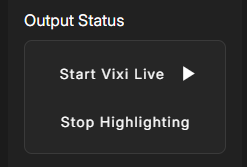
Important Note: To see Live on the Output, you'll need to click the Start Vixi Live button under Output Status in the upper right corner of the Live moderation screen. This switches the output from whichever app it was previously displaying, to Live.

To view the Phone Design from the fan's perspective or to simply test your setup, in that same popup scroll down and scan the QR Code for the app you want to look at: Live, Home, or Stream. Note that for Live and Home, there are separate QR Codes for VIP users (labeled VIP) and General Users (labeled GEN). Stream is an internal tool and does not have a VIP input.
The example below shows both types of QR Codes for Live. Make sure you're looking for the correct App in the list, and then select either General or VIP.

ii. Setting Up Phone Design and Output Design
One of the first steps when setting up any of the Streaming Apps is to configure your graphics for Phone User Input and Video Board Output. If you've uploaded images to the Asset Manager, those will be automatically used here.
You can make additional customizations using the Phone Design and Output Design options in the Left Nav.

Phone Design
One of the more important options you can configure is the post-show redirect. To set up a redirect, select Phone Design in the Left Nav and then select Streaming in the dropdown. You'll see the Redirect field in the far right column.
When the moderator ends each activation of Vixi Live, all participating fans are redirected to the URL that you've specified. Typically this is a sponsor website, or a ticketing / event / merch page.

Output Design
You can fully customize the format of the Output by going to the Output Designer and selecting Live, Home, or Stream in the dropdown.

You can fully Note that for Live and Home, there's a dropdown menu at the bottom of the designer screen. When using 1 feed, 2 feeds, 3 feeds, or 4 feeds - each of those variations is designed individually using the dropdown. Note that you aren't choosing between 1, 2, 3, or 4. You are simply designing each of the 4 versions of the same page. The appropriate version is automatically used depending on how many feeds you have chosen to use.

iii. Moderation on Event Day - Live
Now we'll review the moderation flow on an event day. The first thing you'll need to do is to power on the streaming servers. All 3 streaming apps are powered-on together. To power-on the servers:
1) Click the gray button in the header next to the dropdown menu. This opens a menu
2) In the menu, use the dropdown to select the duration for the servers to remain active and click "Start the Servers". While the servers are starting up, the button will turn yellow
3) After 4-5 minutes, the servers will be live and the button changes from yellow to pink. You can mouse hover to see the time remaining, and you can click the timer to add an additional 30 minutes. You can do this several times and extend the timer to 12 hours maximum


Once the servers are powered on, you're ready to use all 3 streaming apps. Let's review Live first. There are 5 steps to running Live. If you remember these 5 steps, you'll be in great shape.
- Unlock
- Call to Action
- Click "Start Vixi Live"
- Moderate
- Lock
Step 1 - Unlock:
The first step is to unlock the show. To unlock, first hover over the Lock icon in the header. Then move the mouse down and click Live. When you click it, the show is unlocked and fans will be able to join once they scan the QR code. Its very important to unlock the show as the first step, otherwise fans won't be able to join and it will appear as if there is no one participating.

Step 2 - Call to Action:
The second step is to invite fans to participate by displaying a Call-to-Action graphic (or CTA). There are 2 ways to display this graphic.
1. Graphics Machine
or
2. Capture Playlist
You can use a graphics machine to display the CTA on the video board. This call to action would have text such as "Scan to join!" and would display the QR Code for Live - General Input (not VIP), which is found in the upper right popup window. Below is an example of a Call to Action.

The second way to display a CTA is to use the Capture Playlist functionality. You can use the Capture app to display the CTA, and then switch over to Live when you're ready. Here are the steps to set this up:
1. Click the Yellow button in the upper right corner of the screen to open the Capture Playlist
2. Click the Gear button to open the Settings
3. Upload a CTA that you have created to one of the 3 CTA slots
4. Click the CTA Button to add that CTA to the Capture Playlist
5. Enable the REPEAT button on the CTA
6. Press PLAY to run the Capture Playlist and display the CTA
These steps will result in your Live CTA being displayed on the output until you manually switch over to Live. The instructions below will describe how to transition seamless from the CTA to Live.


7. In the top nav, switch back to Live by clicking the Live tab
8. When you are ready to begin the Live segment, click on a fan to highlight them
9. In the top right corner where it says "Output Status", click "Start Vixi Live" to seamlessly switch the output from the Capture Playlist to the Live output
10. Continue with your normal Live moderation using the steps below
Step 3 - Click the "Start Vixi Live" button
In the upper right corner of the Vixi Live landing page is a "Start Vixi Live" button. This causes Live to "take over" the output and begin displaying. You can click this button at whatever time seems best for you, but it must be clicked before Live can be seen on the output.
Step 4 - Moderate:
The third step in running Live is to moderate the show. To moderate, you are simply clicking on a fan to highlight and display them on the Output URL. A typical flow would be to highlight a fan, and give them about 4 to 5 seconds of air time, and then click the next fan. You would repeat this process for the duration of the activation.
Lets quickly cover how the virtual line works. The first 24 people that scan the QR code will appear on the moderation screen right away. Once a fan is highlighted, and then a second fan is highlighted, the first fan is removed from the moderation screen and is placed back at the end of the virtual line. Their spot on the moderation screen is filled by the next person in line as they become unhighlighted. As you cycle through and highlight a new fan every 5 seconds, you'll automatically have an incoming flow of new fans.
Note that a fan using the VIP QR Code skips any line and instantly appears on the moderation screen with a gold pin to indicate their VIP status. The standard use of the VIP QR Code is to give it directly to VIP guests such as celebrities or family members. You also have the option of giving them a VIP URL in place of a VIP QR code. The user would then click the URL to join as a VIP.

While moderating, there are 2 optional buttons that you can mix in if you want. The first button is a Kick button, and it appears in the upper right corner of each fan's feed on the moderation screen. When you kick a fan, you're simply moving them to the end of the line and getting the next fan in line to replace their spot. The fan won't know you kicked them. Common uses of this button are to remove someone with poor framerate, or someone who isn't participating in an ideal manner.

The other button is the Pin button. It appears at the top left of each fan's feed on the moderation screen. When you pin a fan, it locks them to that square for the remainder of that particular activation. You are then free to highlight the fan and move away from them, without sending them to the back of the line. One use for this would be a dance battle. You could pin both fans and then go back and forth between them.
Step 5 - Lock:
The fourth and final step when moderating Live: Lock the Show. All you need to do is click the Unlock button in the top nav. This will immediately Lock the show, and redirect all fans to your Post Participation Message, and/or URL. Locking the show is important for two reasons. The first reason is to drive all the traffic to your redirects, and the second reason is to keep the system performance at an optimal level. If Live is left unlocked for an extended period of time when not in use, its possible that system performance could be affected.

After locking the show, that activation has ended and fans are sent to the Redirect URL that you've set up in the Phone Design for Streaming. For another activation, simply repeat those 4 steps:
- Unlock
- CTA
- Start Vixi Live
- Moderate
- Lock
Output Mode:
As the final feature for Live, you can change the Output Mode. This number determines how many fan feeds are displayed simultaneously. The system is defaulted to 1, as the moderator only highlights one fan at a time. If the Output Mode is changed to two, there will be two fan feeds displayed on the Output, and the moderator can highlight 2 fans at the same time.
This option can also be set to 3 or 4 feeds, but moderation becomes much faster so this should be reserved for experienced moderators.
The moderator chooses which feed to show a fan on by mouse-hovering over the fan and then clicking one of the available buttons. In the image below, the output is set to 4-person mode. When mouse hovering over a fan, the moderator sees a button for each of the 4 feeds. A single click of any button will assign the fan to that feed.
Mouse-Hovering over a fan with 4-Person Mode enabled allows you to see the available feeds.

Once you assign a fan to a specific feed, that feed number can be seen next to the fan's image.

Output Modes 1, 2, 3, and 4 (These can be fully customized in the Output Designer)


iv. Moderation on Event Day - Home
Home is a separate app from Live, but functions identically. The only difference is that Home has the additional functionality of a Return Feed for phone users, showing them video and/or audio. The return feed is typically set up in one of two ways:
- It's used to broadcast the live event back to the phone users. This allows the fans to watch the broadcast as they wait to become highlighted by the moderator.
- A second use would be to show a live view of the video board so that fans can directly see themselves on the output once they are highlighted by the moderator.
To use Home, you set it up and moderate the same way you would for Live. There's one additional step of linking the Return Feed that fans will see on their phone. Once the Streaming servers are started, you'll see a white circle icon in the upper right corner of the screen. Click this icon to begin configuring the Return Feed.
The suite will auto-detect any incoming feed sources, and these options will appear in the 2 dropdown menus:
- Top Dropdown / Video Feed: This is the video feed that participating fans see on their phone
- Bottom Dropdown / Audio Feed: This is the optional audio feed that accompanies the video feed

Important Note: To see Home on the Output, you'll need to click the Start Vixi Home button under Output Status in the upper right corner of the Home moderation screen. This switches the output from whichever app it was previously displaying, to Home.

v. Moderation on Event Day - Stream
Stream is an internal tool for your team to use in place of production cameras. When using Stream, you can have up to 4 mobile devices act as cameras, with audio. The moderator can then choose which of the feeds to broadcast live.
To use stream, scan the Stream QR Code with the mobile device you want to use as a camera. Alternatively, you can copy and send the link to that phone. Once the mobile phone scans the QR Code or clicks the link, they will be prompted with the following:
- Select a Camera: Choose which camera your mobile device will use. You'd typically want to select a Rear-Facing camera unless the segment is focused on the camera user
- Select a Microphone: Phones typically have 1 microphone, so this selection will be easy

After making your selections, you'll be broadcasting to the Moderation Screen within a few seconds. The moderator can then display any feed on the output simply by clicking on the feed to Highlight it. Once a feed is Highlighted, it will display 1:1 in the Output.
Important Note: To see Stream on the Output, you'll need to click the Start Vixi Stream button under Output Status in the upper right corner of the Stream moderation screen. This switches the output from whichever app it was previously displaying, to Stream.

You should now be able to setup and run all 3 Streaming apps. Please use the Support Chat if you have any additional questions. Thank you.
Was this article helpful?
That’s Great!
Thank you for your feedback
Sorry! We couldn't be helpful
Thank you for your feedback
Feedback sent
We appreciate your effort and will try to fix the article